Review a minFraud transaction
You can use the minFraud transactions page to review any previously submitted transactions through your account portal. This feature is available to admin users and standard users with product/service permissions. Learn more about user permissions.
In addition, you could integrate the minFraud service to take IP risk score, risk score reasons, and risk data returned through API queries and incorporate this data into your own review system. Full integration documentation, which developers and engineers can use to integrate minFraud API responses into a local system, can be found on our developer portal.
How to review a minFraud transaction through the account portal
Click on 'minFraud Transactions' in the minFraud menu in your account portal [direct link, login required].

The minFraud transactions page will display a list of transactions submitted by your account. By default, this page will display up to 50 transactions submitted in the last 30 days, but you can filter, search, and change the number of transactions displayed per page. Learn more about the log of minFraud transactions, and how to search your transactions.
When you have found the transaction you want to review, click on the linked transaction ID in the transaction ID column.
Reading your minFraud transaction review screen
The minFraud transaction review screen displays a lot of information. Some of this information is only available if the transaction was run through the minFraud Insights or minFraud Factors service. Learn more about the differences between the minFraud services.

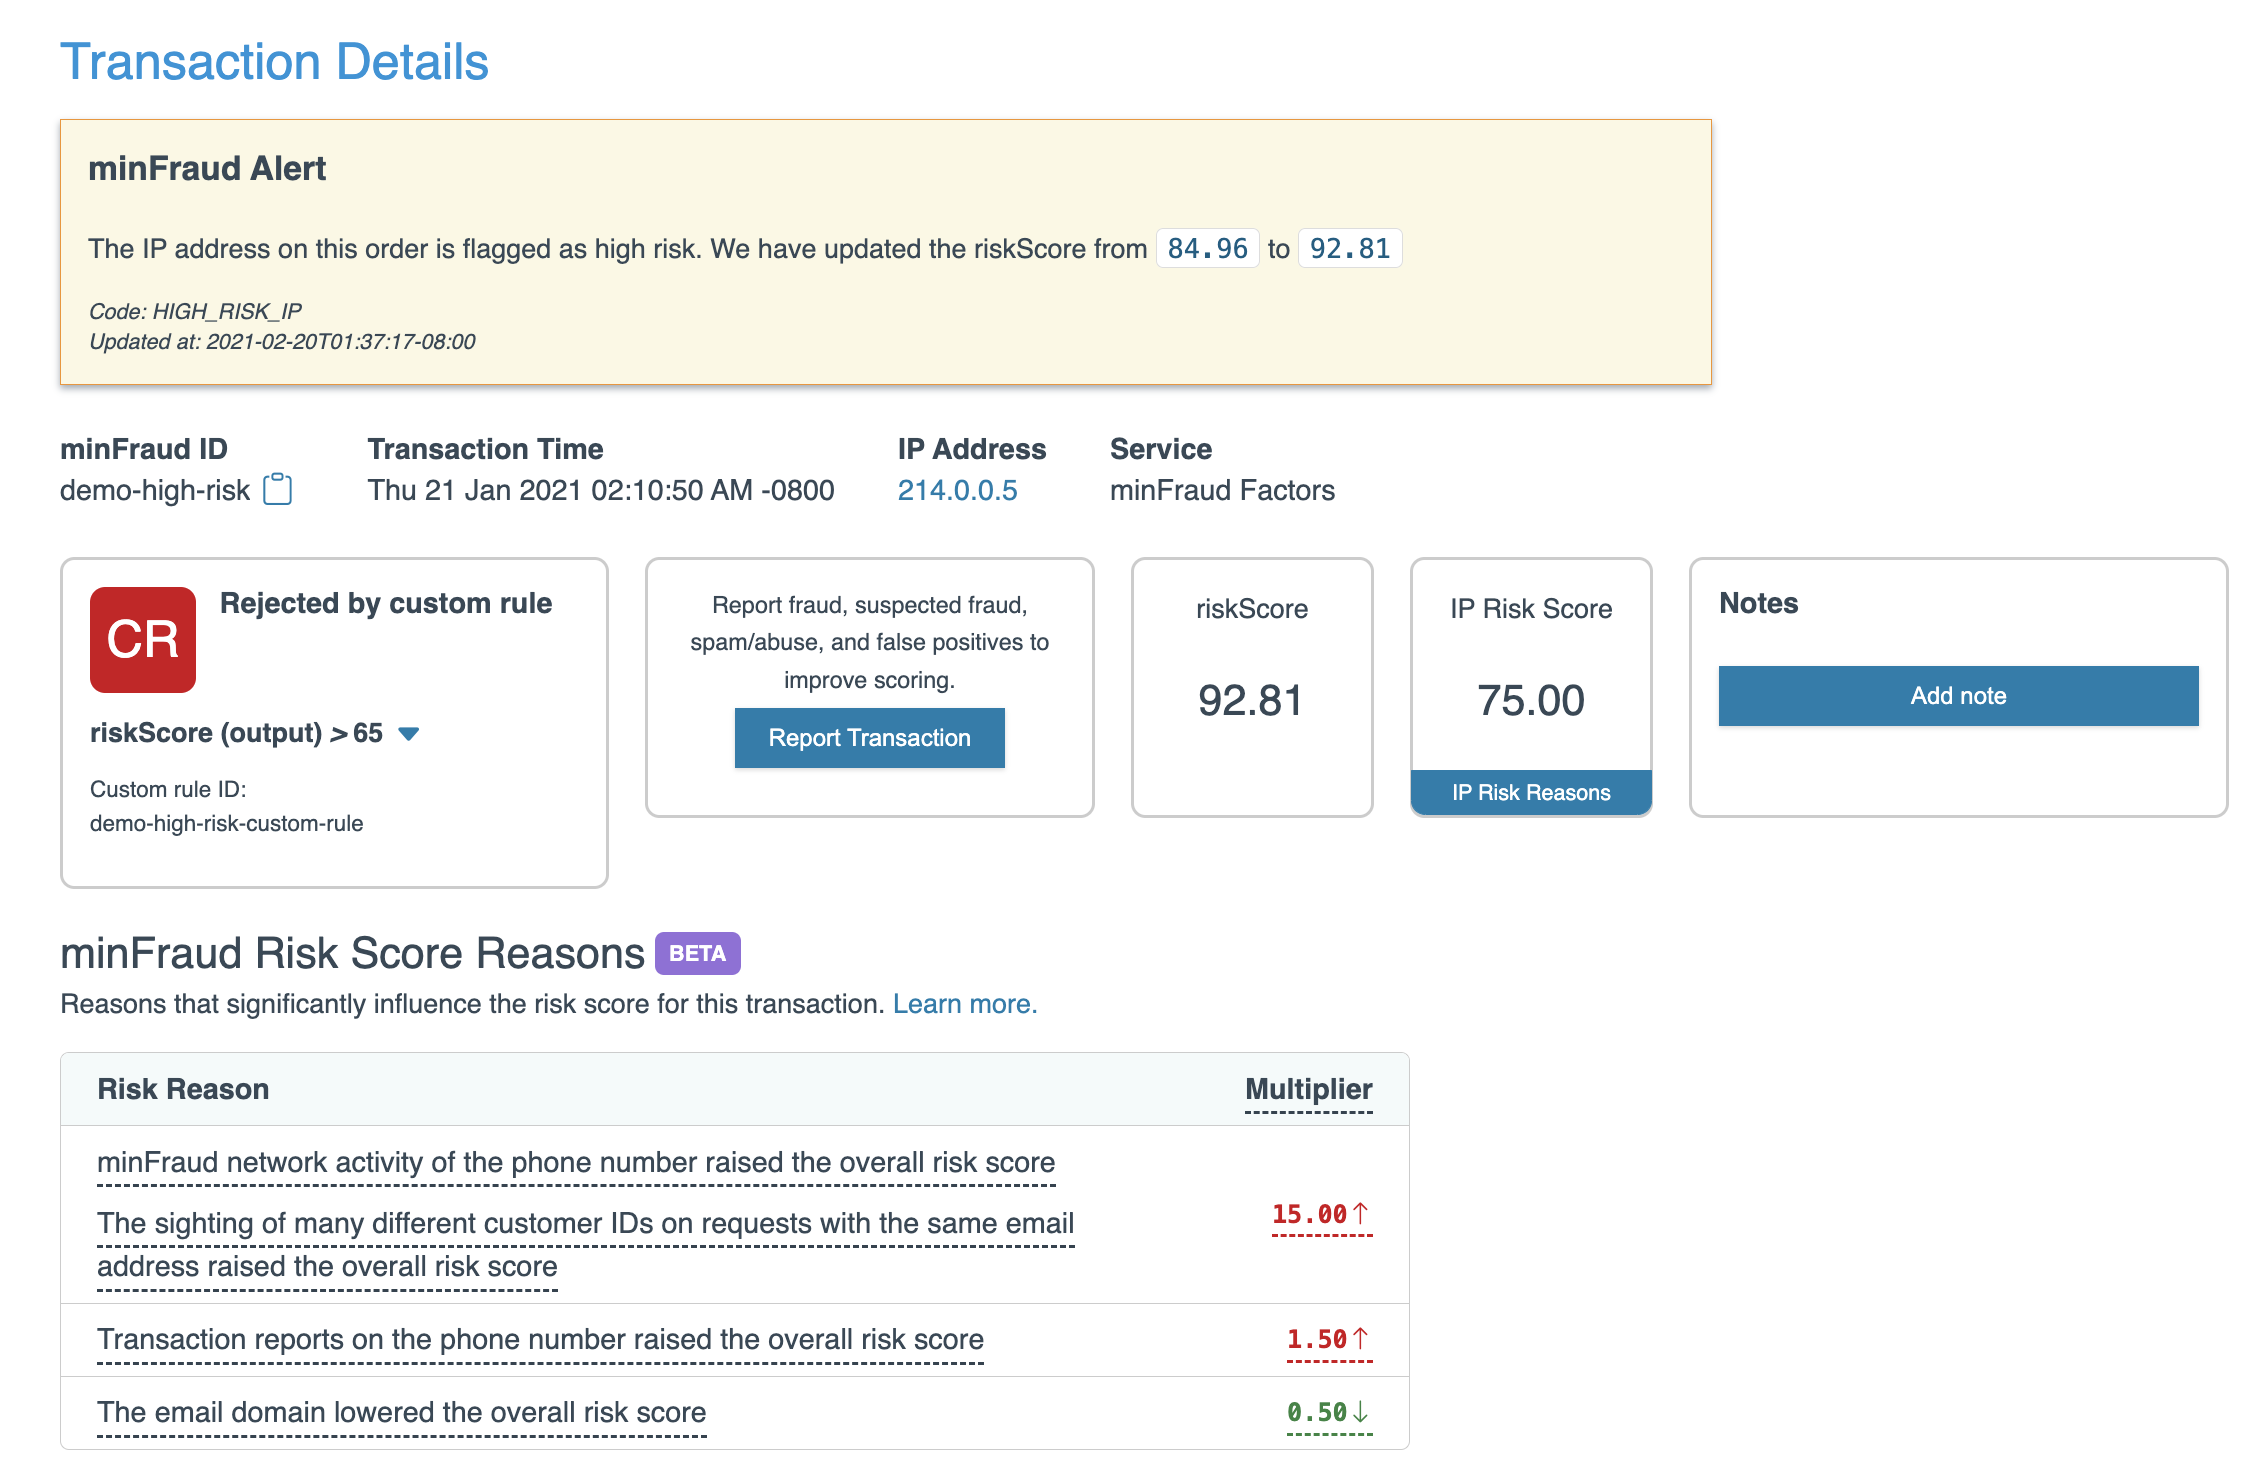
On this screen, you can find:
- The minFraud Alert status, shown if this order was subject to a minFraud Alert. Learn more about minFraud Alerts.
- The minFraud ID of the transaction. If you keep a local log of your minFraud responses, you can use this ID to find the transaction. See the full API specification for the minFraud ID on our developer portal.
- The Transaction Time, the time that the transaction was submitted.
- The IP address that was submitted for the transaction. You can click on the linked IP address to see a list of all transactions submitted with this IP address. This can be used to see all activity from a particular IP.
- The service level (between minFraud Score, Insights, and Factors) that was used to score the transaction. Learn about the differences between the minFraud service levels.
- The transaction disposition, which is "accept" (by default), "reject," "review," or "test." Learn more about custom rules and dispositions.
- The Report Transaction widget that you can use to report the transaction. Learn more about reporting transactions.
- The overall risk score. Learn more about the overall risk score.
- The IP risk score. Learn more about the IP risk score.
- A Notes widget to add notes to your transaction.
- Risk Score Reasons, a set of data that provide you with specific and understandable reasons for why a risk score is high or low. Learn more about risk score reasons.
Below these, you can also find:
- The IP risk reasons, for transactions with an IP risk score greater than 0.01 which were submitted to minFraud Insights or Factors. Learn more about the IP risk reasons.
- The inputs submitted for this transaction. You can compare the inputs listed here against your local record to check for any discrepancies if you are troubleshooting. In general, passing more inputs to minFraud makes risk scoring more accurate. Learn more about passing inputs to minFraud.